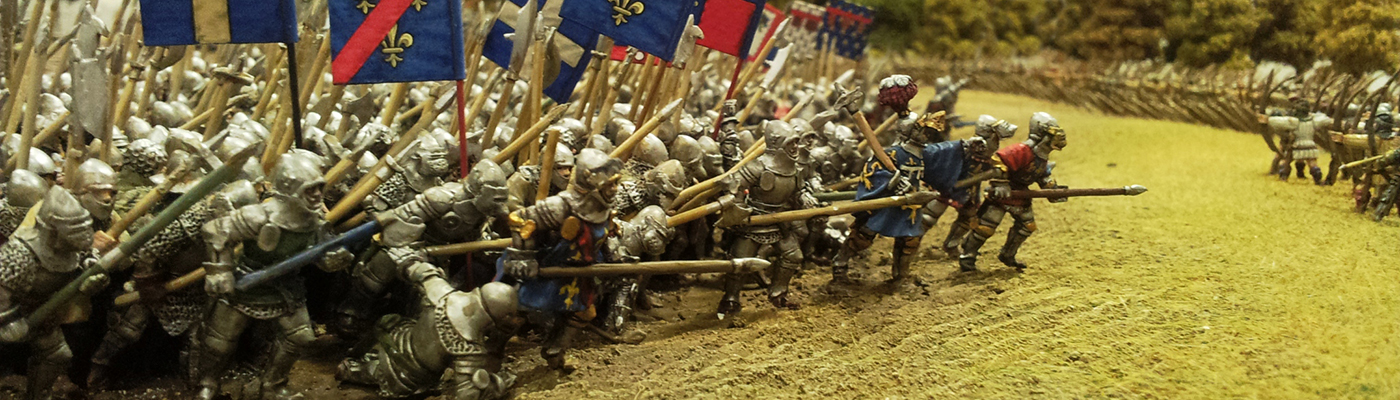
There is a saying amongst miniature painters; Faces, Bases, Flags, and Shields. This is because those four parts of a miniature make the biggest impact on its overall appearance. In this article we are going to focus on bases, the rest will have to wait till next time.
Now many miniatures can look great from across the table, and the best way to theme or otherwise group your models is with the basing. If you base a regiment or unit the same they will look more cohesive. Better still that you put a little extra effort in and make those bases really stand out and make your friends jaws drop when your soldiers come storming across the table to seize the objective.
Making the bases of your miniatures look great just takes a little thought and a few readily available materials. The most important thing to do (and one I always forget) is to plan your basing scheme and do a couple of test bases. If you are going to do elaborate bases then it’s worth knowing how much time and effort is involved in making them.
In future articles I will expand upon different basing styles but this one will be about what most people consider the standard basing scheme.
Basing can be broken down into several sections, height, texture, painting and elements.
Height
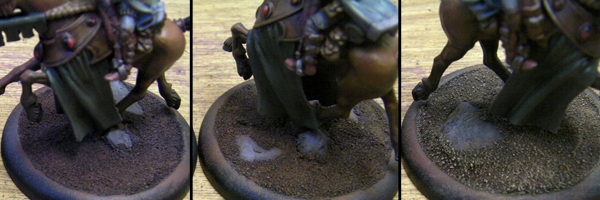
Normal bases supplied with your models have a flat top surface for you to attach the miniature to. With a bit of material you can change this flat surface into an uneven one, I like to do this to all my miniatures because it makes the terrain look much more realistic.
I like to stick blue slate chips to the base first. If I am doing a unit or regiment I try to put one on every third base or so, depending on how rocky I want the ground to be. You can use a hot glue gun but I prefer to use good quality thick super glue. Alternatively you can use cork to build up a rocky section and I would defiantly use the hot glue gun here.
Next I add a thin layer of Milliput (I like the yellow-grey stuff) to any area of the base that is still showing. You can also use this to fill any slots or gaps the base may have. Milliput can be a little messy so wear thin plastic gloves if you have them.
Texture
For the texture layer I use a sand of various types. If your Milliput is not dry yet do not worry, it will even dry underwater so you do not have to wait to continue working. Chunky sand adds a great texture but you need to be careful where to place it so that your model will have somewhere to stand. Fine sand is used to fill and cover the rest of the base as it gets into all the gaps where chunky sand won’t fit. I use white PVA glue to attach sand.
With a texture layer on you need to let the base dry, this can be sped up with the aid of a hairdryer but it’s much better to leave it overnight.
Once dry you have the option to seal the base. I tend to do this more often than not, and always do so with chunkier sand. Just cover all of the sand with thin white glue and leave it to dry. This will ensure that the sand will not come off and will add allot of durability to your work. It’s also worth putting a thin coat on any cork you have used as the stuff can easily break off.
Painting
With your base all dry you can now paint it. You can attach the miniature at this point if you so wish, it may be easier or harder depending on the base you are making so the decision is yours. If you choose to attach the miniature you may need to pin it in place.
I usually prime all my bases either black or brown. I use the Army Painter colour primers as they are excellent and do not cost a fortune. If you are basing your terrain or tables to match your army I would find similar equivalents to the paints you use in the ‘tester pot’ section. It is far too expensive to use miniature paints on basing terrain!
Over the black primer I will dry brush all of the sand with a dark brown, followed then by a mid brown and finally a bone colour. The three I have used are Vallejo 70.984 Flat Brown, 70.983 Flat Earth and 70.819 Iraqui Sand. Any slate or rock will be dry brushed with whatever random rock colour I feel like using, typically medium grey or sandstone. You can also add a highlight to the rock with a lighter colour if you so wish.
The base edges should be finished in whichever colour you find most suitable. I like to use black on bases with lips or allot of height and brown on more flat ones. It is important to keep this colour consistent across all figures in the same army.
Elements
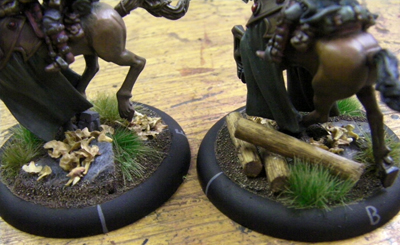
With the base painted and miniatures attached you now have the option to add one or more elements to the base. A basing element is anything extra like static grass, tuft, long grass, fallen trees etc.
Most hobbyists will use static grass and you can get it in a huge variety of colours. For my own personal miniatures I like to use tuft. You can get some really nice railway ones made by Knoch that have flowers and all sorts of bits on them. These are a little expensive and as I am ways doing armies I tend to avoid them and use some of the cheaper ones that do not have flowers. You can buy small packs of this stuff from the Army Painter, but if like many of us that have a lead mountain to climb and many bases to do you are better off getting it in larger sheets.
To make logs I have a selection of thin branches and twigs from a bush that was cut down in my garden. When they dry out you can use a pair of clippers to cut them into sections and glue them on with a drop of super glue. The natural colour of these branches mean that I do not need to paint them, but you can add a slight tint with some ink if you desire.
Some guides will tell you to attach elements like branches before painting. I did not do this here because I liked the natural colour and can attach the miniature easier without them in the way. Remember to always use good quality super glue, if you use the cheap and nasty stuff it will frost and ruin your model.
The most striking element I have used here are the leaves. They are made from birch seed pods and available in several colours, the ones I have used are called ‘natural’. Elements such as this add a ‘pop’ effect to your miniatures, making them much more eye catching and adding that wow factor.
I like to add a sealing layer of white glue to the leaves after they have dried. It does add allot of extra drying time to the model but I have found without it they can easily break or fall off. There is also a glossy effect left by the glue when you do this so you will need to thin down some matt varnish to remove it.
You can add an infinite number of elements to your bases, the more you add the more detailed and eye catching your base will become. If you need ideas try Google images for your base type.